Designing and making the mold
I wanted to do a cute little mold of something really simple to try out the machinable wax we bought. I tried something new for me design process. First thing I did was to draw a little boat using Adobe Illustrator.


To do so, I use the pen tool for my trace and the circle tool for my windows, easy peasy!
Next, I save the Draw as an SVG and import it into Fusion360 using the import SVG Function.


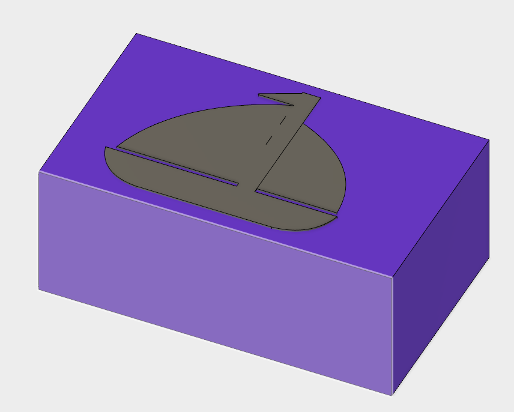
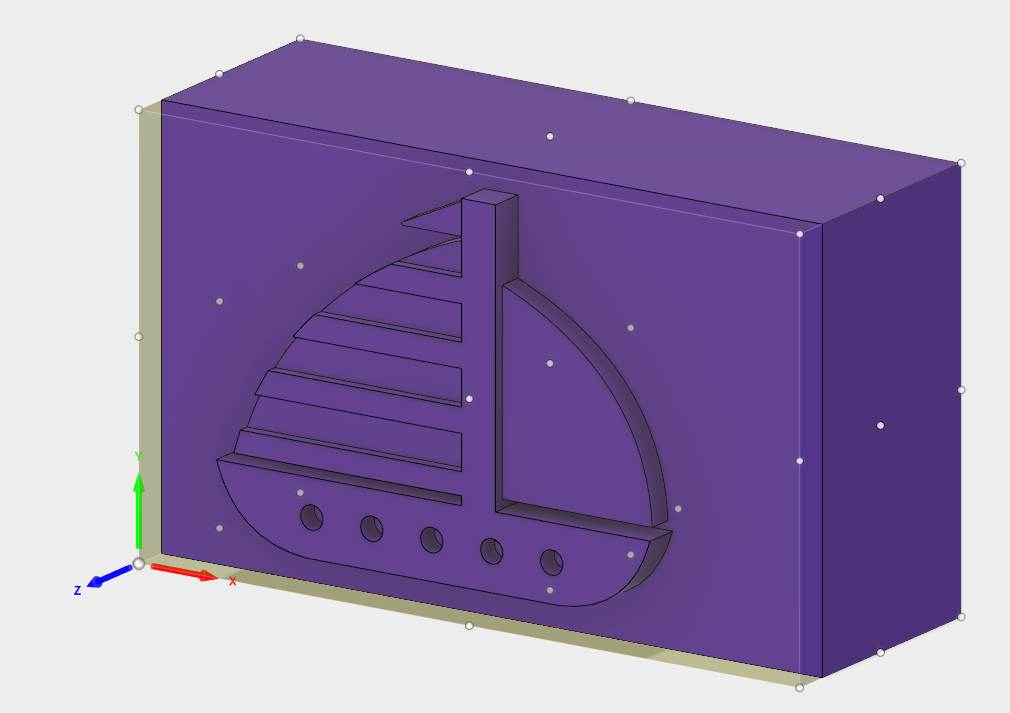
The newly import draw is now being interpreted as a sketch inside Fusion, so I was able to extrude the boat with different layers of thickness to give a nice feel to my boat.
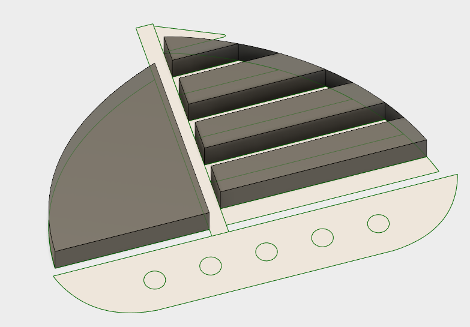
This is pretty cool, one thing that you may realize is that we have here the negatif of my design (ex: windows outside instead of inside the boat), this is because we will use this extrusion as a tool to impregnate the boat inside our block of machinable wax. To do so, I made a simple rectangle using the size of my machinable wax and import it inside the project.
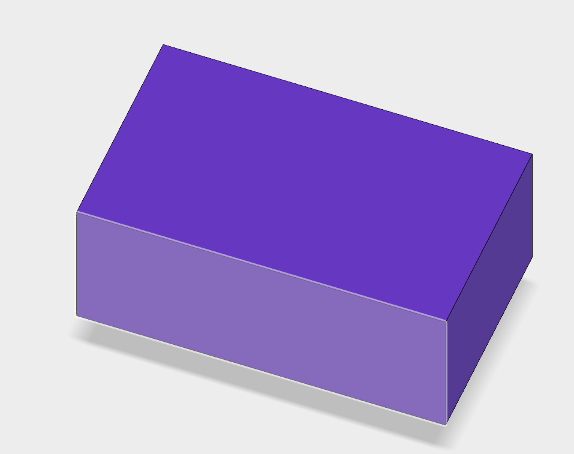
Next, all I have to do is to place my boat on the rectangle and use the combine function to use the boat as a tool to cut the mold.
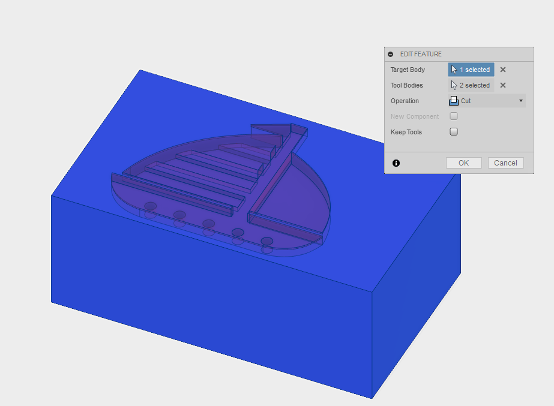
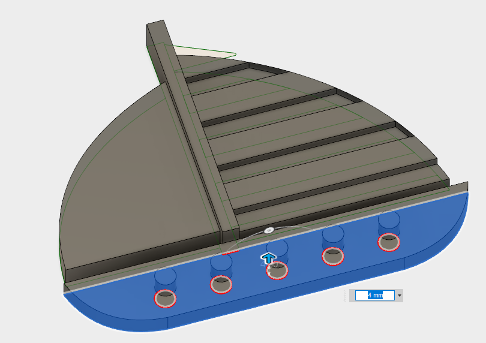
For my first try, that was it, but when I saw the result I realise (stupid me) that I had to offset the top face of the mold so I could cast my resin inside it and not outside. Here's what you don't want:
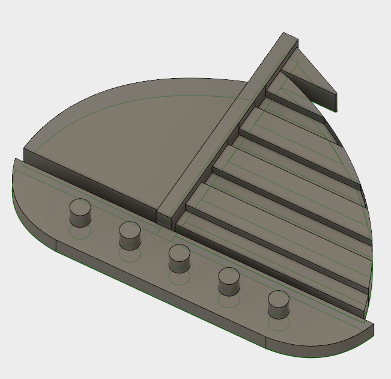
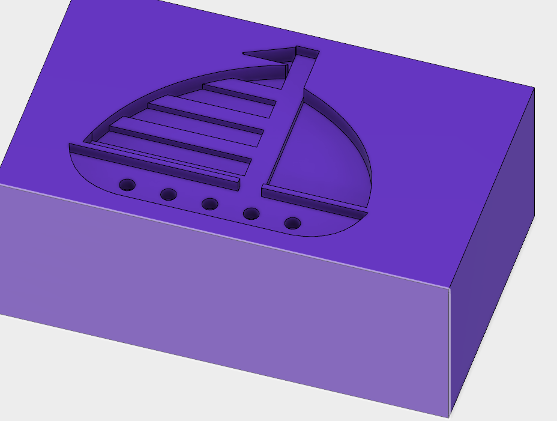
I felt really dumb when I realize the mistake I made, but without mistake, there is no learning! So I started again, going into fusion, I just had to use the offset face function and select the top plane and push it down under the boat, like this:
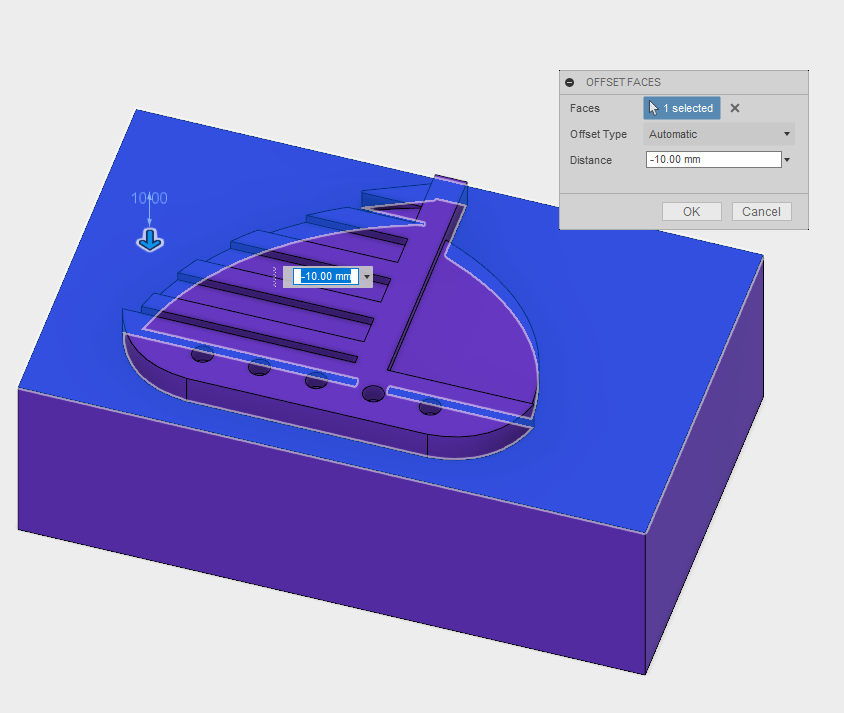
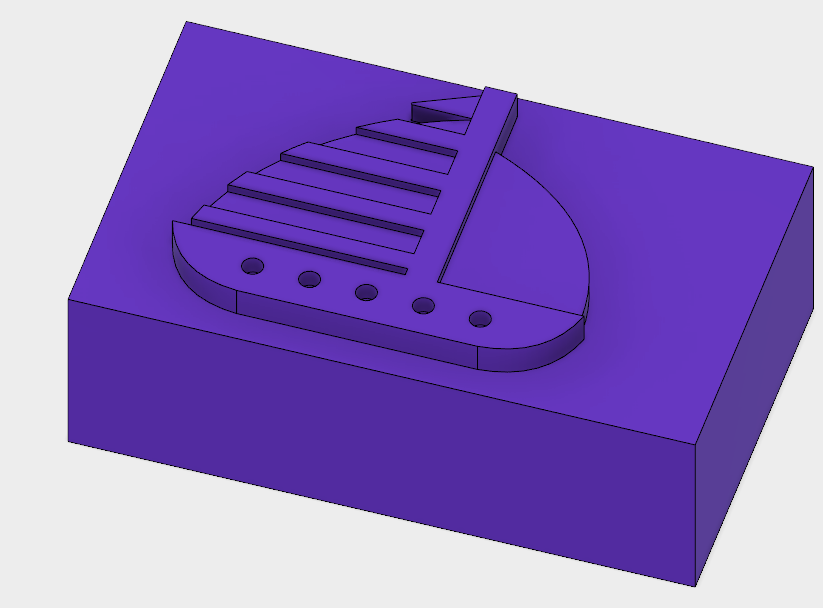
Now we have something that makes senses!
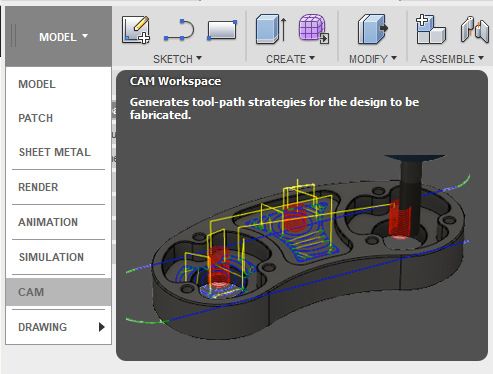
The Next step is to program our toolpath, I decided to try out the Fusion360 CAM tool and I am SO HAPPY I did, this is the number 1 tool I will use for now on. First thing I did was to Listent to this very well madeTutorial. This gave me all the basic I needed to get started using the tool.
First step is to go into the CAM tab inside Fusion360
First thing I did was to prepare my stock setup, the first thing is to setup my origin point onto my design.
Then I went and select the 2D pocket toolpath and created the tool I wanted to use:
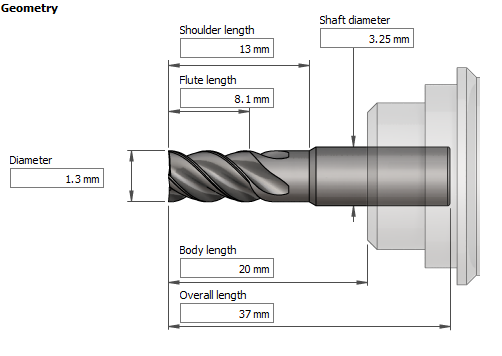
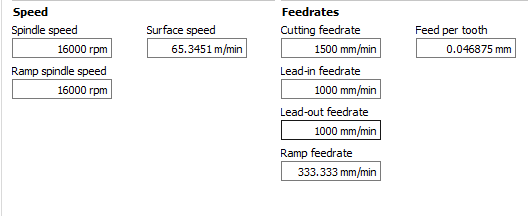
I use reasonable feedrate to be sure I will go easy on my tool. 1500mm/min feels allright for me.
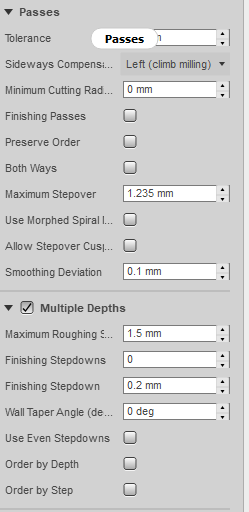
Next, I selected the faces I wanted to machine and went into the passes tab to make sure that the job would generate multiple passes to go easy on my tool.:
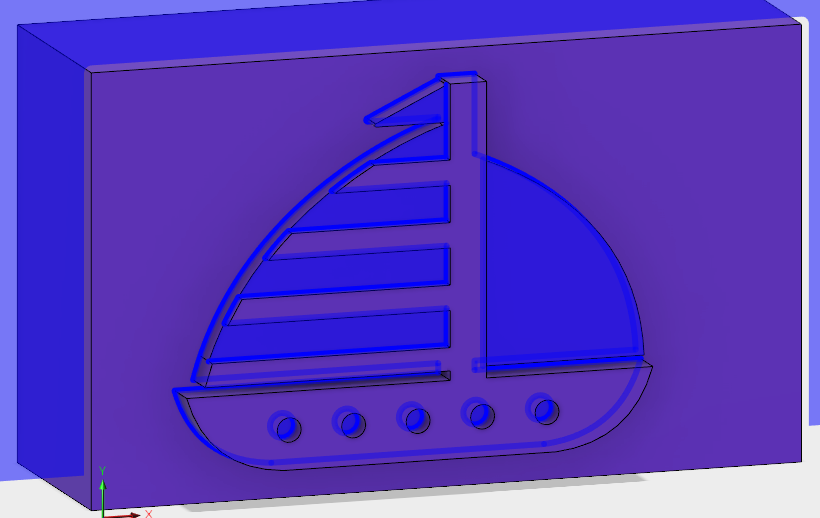
And here we are it is THAT simple!, sure you can tweak your toolpath and the way you generate them all you want, but here are the results I got:
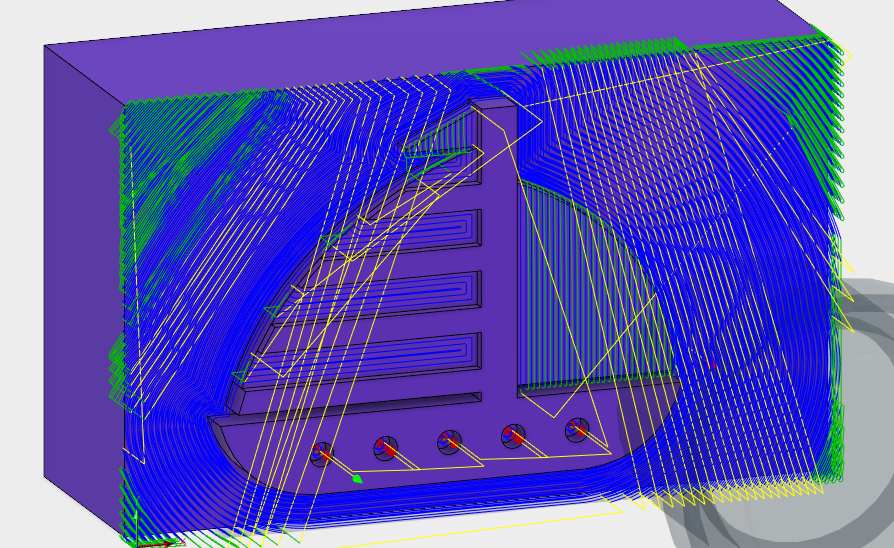
This seems pretty good, you can use the simulation tab to see live from the software how will the tool work:

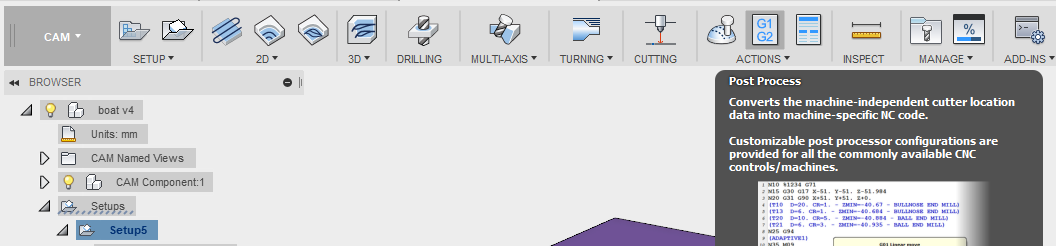
Pretty cool right? The final step is to convert everything into a GCODE, to do so just select the postprocess tab (make sure you tool path is selected) :
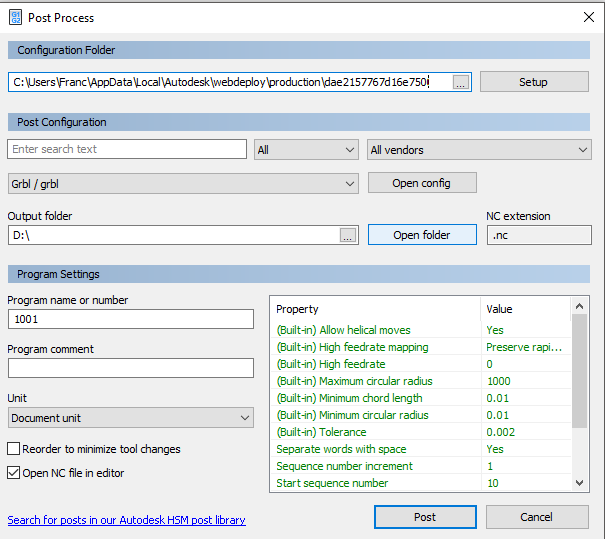
Youre gonna have to select a post processor, depending on your machine, Gcode may be read and interprete differently, Postprocessor are ways to write the gcode for your machine, some post uses command that other don't, such as T1 for changing the tool during a job. If youre confused and don't know which post to use, you can always speak to youre cnc vendor and ask him a post made for youre machine, or do like me a select GRBL, GRBL as you may know is a really standar post that is compatible with arduino and very comon for DIY project, it will give you a dead simple GCODE like you know them!
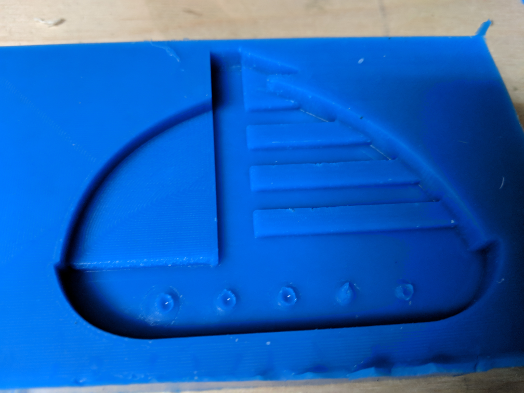
Once the Gcode is output let's go mill this mold!!
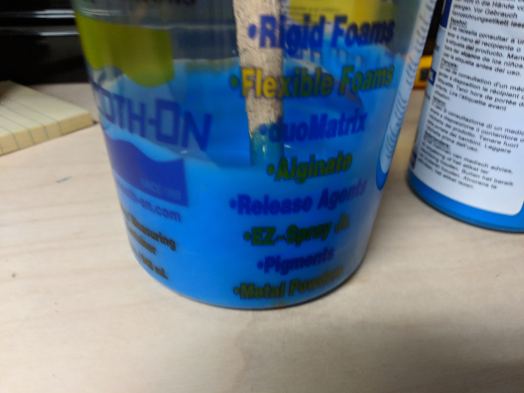
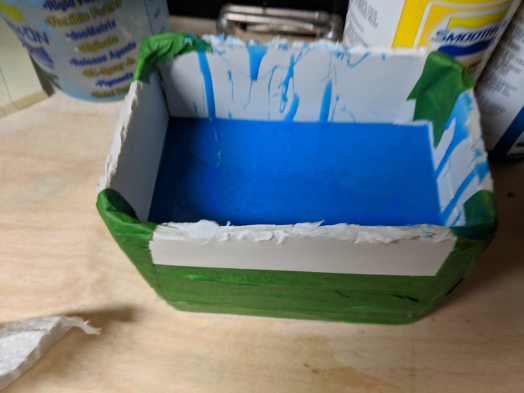
For the rest, the process is the same that for the first project above, we start by doing a little box that will keep the sillicone mix inside our desired area, we mix the two solution A and B equally, we shake well and we pour into our box.
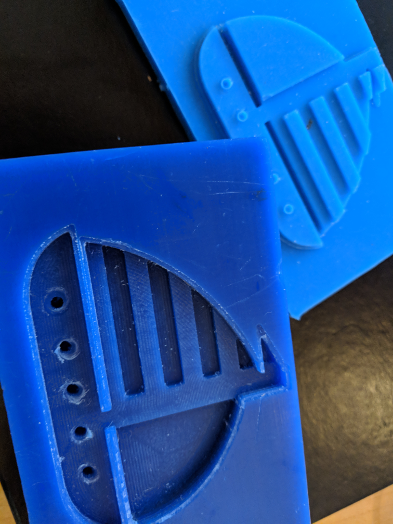
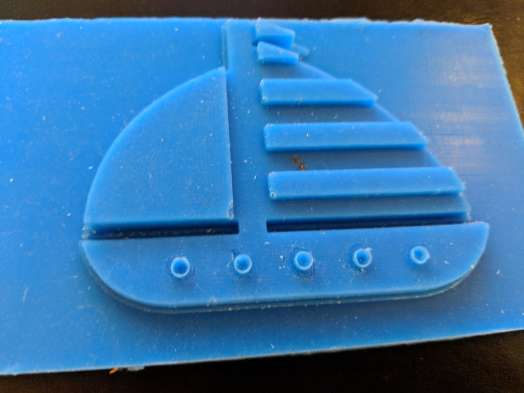
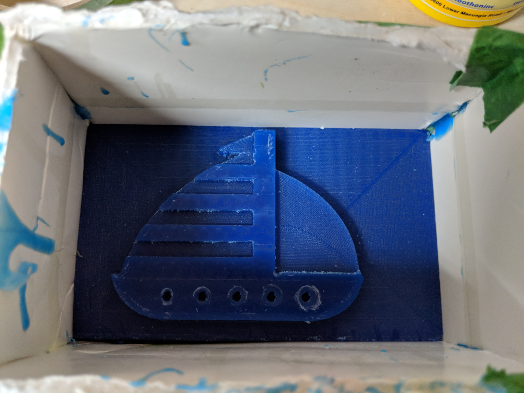
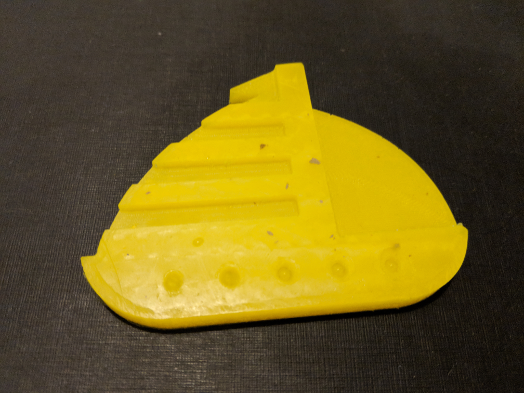
After a few hour (around 6), the mold is ready and we can pour the cast inside it to have our final solid cast model, I add a yellow pigment to my smooth-on cast 326.
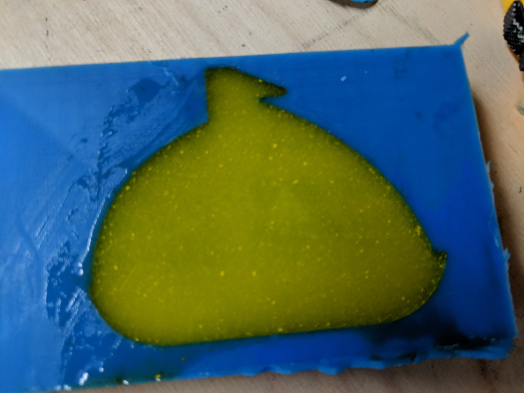
The final result is pretty cool, one thing is that they were some dust inside my cast so the model doesn't look super clean.
This week assigment was super fun and I learned a lot! Fusion360 is super for CAM!
My Files!